A layer of 4oz with the new rice papers then laminated. Then the deck was filler coated.


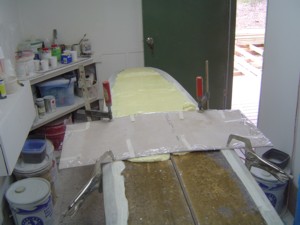
 A layer of 4oz with the new rice papers then laminated. Then the deck was filler coated.
 The deck logos were barely visible under the yellow and crazed glass. The bottom Barry Bennett diamond shaped logo was completely gone. All that could be seen was the diamond shape.
 The logos were removed. The plan was to restore them and rebond them to the board. But this soon changed. I was helping out a good friend who has been in the industry for years. He was working at Bennetts in the 70’s and had shaped some of Nat Young Surf Designs shapes during this period. We were sorting through some of his accumulated clutter and out falls a rice paper exactly the same as the one on the board. I told him that I was restoring this board and he was kind enough to donate it to the project. The NYSD font was sourced online and a new rice paper was made using my home computer and printer.
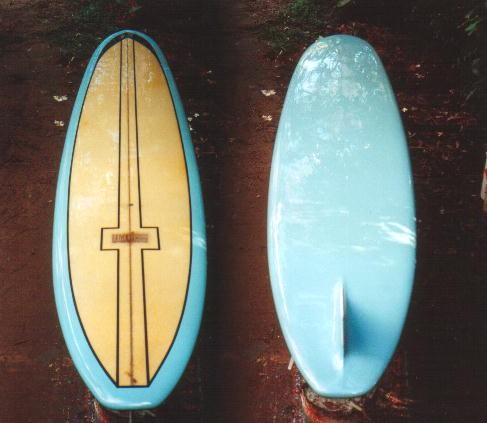
 It may not seem it by looking at the board in its pre-restored state, but the original colour is pale blue. This was revealed after removing the deck logos. So the board painted pale blue. The deck being a few shades darker than the bottom, lapping onto the bottom to give the impression of a cut lap. Once cured the board was topcoat cleared, wet and dry sanded and polished.


 Sweet Country Corn was a brand built by Bill Cilia (Nirvana Surfboards) while he was working at Shane Surfboards in the 70's. Bill can't remember how many boards he built under this label. But he does remember how he came up with the name. The story goes that Bill was sitting down with Shane one day at the factory and they were discussing what name he could use on these new boards. At the table was a can of Sweet Corn.
 This board was shaped by Russell Head. Late 70's early 80's. Single timber centre stringer with two resin glue up stringers added. As seen in the original photo the deck is in good condition. With only two areas that needed covering. The ding on the left rail and the area where the old legrope plug had been removed.
 Unfortunately the bottom was not in the same condition as the deck. Plenty of dings, and a number of stressies needed repairing. Once the dings were sanded, the bottom was sanded and filler coated. The whole board was fine sanded and painted. Red pin lines and lightning bolt added. Clear coated, wet and dry sanded and polished.
 There seems to be a fair few of these boards floating around. This one is the third that I have restored. The last two were shaped buy Geoff McCoy. Some body had set fire to the tail of this one. So the area behind the fin was pretty much destroyed. That is the area where Geoff McCoy had initialed and printed the basic dimensions on the other two boards.
 These two photos show the board pre restoration. The rails had been painted and some crude repairs had been attempted around the fin. You can see the black, burnt glass in the photo of the bottom.
 The pigment laminate with cut laps has been capped with a layer of 4oz. The new fin was then set on top of the 4 oz. The whole repair was filler coated. All the other dings were repaired, and the board was sanded ready for glossing.
 The new fin was made using 10oz Volan glass and general purpose laminating resin. The GP resin was used to achieve the old look. The template is from the original fin.
 This board is a WM (William Morton) Tracker. It was shaped by Vic Elliott. WM Surfboards was located at 58A Cumberland Road Auburn Lakemba NSW 1967 to 1969. William Morton was glasser and shaper. He was previously employed at Ron Surfboards with Geoff McCoy. They later formed M and M Surfboards, Auburn NSW. The rest is history. The dimensions are 7'8" x 19 3/4" x 3'' The nose is 13" and the tail is 8"@ 12"

 The board was in a bad way when I received it. To most people it would be rubbish, after all that is where it was found, on a garbage pile. An eight-inch section of the nose was missing and three inches of the tail was also missing. The original fin box was still in the board but somebody had crudely bonded a fin into the box with resin. The deck had a number of areas that had delaminated and it was covered in dents and dings. The whole board needed to been sanded to prepare for the ding repairs. Once sanded, the nose and tail areas were prepared for the new foam. The old fin box was removed and the resulting hole was filled with foam. The nose and tail were reshaped and everything was glassed. As the board was going to have a full colour job all the dings needed to be glassed to stabilise the dinged areas. Then they could be filled with a 75/25 mix of Q-cell/ Aerosil. The next process was to sand and fair and a layer or 4oz applied over the filled areas. The rails were in such poor condition that after being faired two layers of 4oz was applied to the entire length or both rails. The delaminated areas in the deck were removed and the areas re glassed, filled and faired. The section of glass with the shaper’s logo on it was cleaned up and reglassed into the board. The dents in the deck were filled with a wet mix of chopped glass and resin and two applications were necessary to fill all the dents. I had not tried this before and I will certainly use this method again as it worked well. It does add some weight, but as this board is going to be a wall hanger the added weight is not a major consideration. Normally if there are a small amount of shallow dents to fill I’ll use straight resin. But because of the amount and the size of the dents and the amount of camber in the deck, something with a little more substance was needed. Q-cell / Aerosol was another option but I thought it would be a good opportunity to try the former method on this occasion.
 The paint used was thinners based auto acrylic. This was thinned 1:1 and the TCC was thinned at 1.5:1 The gun used is an Oldfield’s 60T electric airless. It is pretty basic, but it did the job. Any orange peel or overspray dry spots easily sanded out.
 The bottom was painted first. One light coat was applied, left for ten minutes to tack off. Then three wet coats were applied allowing time to tack off between coats. The board was left for a week to cure. Then the deck colours were applied. Same method as above, the white first then the middle. Again the board was left to cure. The board was sanded with 600 wet & dry and masked for the black pinlines. Once sprayed and cured the board was sanded with 1200 wet & dry and glossed. Acrylic Topcoat clear was used. Applied the same way as the colour coats. The fin was sprayed separately one side at a time with the board on its rail in the stands. Again the board was left to cure. Topcoat clear is very easy to get a gloss with. But it is very soft and easily burns when polishing. The board was sanded with 600, 1200 wet & dry then polished with “Farecla” G3 regular grade compound paste. Then finished with “Farecla” super fine polish. Using a lambswool-buffing pad.
 A new fin had to be made. This was constructed from 10oz-boat cloth and surfboard-laminating resin was used. The template is from a “Hohensee” tracker that I own. This was glassed onto the board.
 This is the first major painted restoration that I had undertaken. I normally do full pigment restorations. There does seem to be a growth in the interest of the boards from the late 60’s into the 70’s and people are asking for painted restorations.

 The original stringer was in good enough condition to reuse. Only a small section at either end had to be replaced.
 Due to exposure to the elements for some years, the foam on the bottom of the board has eroded away. Leaving a 10mm deep void along the length of the board needing to be rebuilt. Two pack expanding polyurethane foam was used to fill the void
 As with most old logos, this one was also delaminated. There was also a ding that needed repairing under the logo. You can see the damage to the logo between the S and the A. After the ding was repaired and the edges around the perimeter of the logo were cleaned up, it was re bonded to the board.
 A pinline was applied to highlight the logo. The area damaged by the ding was touched up with a water based Posca pen.
 The fin was originally set into the board. As it had been removed prior to restoration. It was cleaned up and reset.
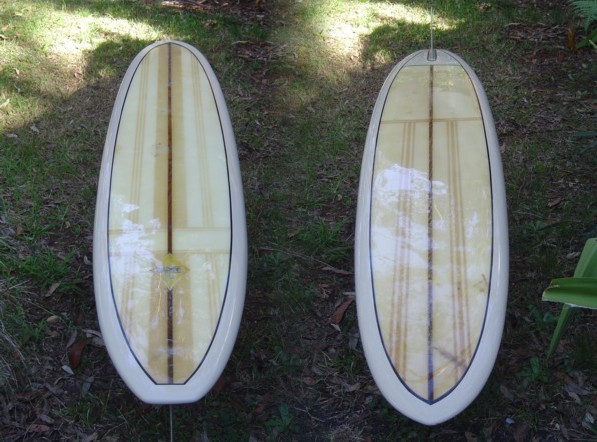 This is the first of two Ron Surfboards to be restored. Ron Surfboards was a subsidiary company of Crane Industries. A plumbing supply company. Geoff Mc Coy started his career in the surfboard industry there. The blue pigment work is original. It is hiding some large voids in the foam on the bottom. The original fin was a plastic dork fin. This was beyond repair and was replaced. The area under the fin was badly water damaged and had to be re built. There had been an attempted restoration a some point. It was decided not to re do the pigment work as the covered foam was quiet white and the reversing effect looked good.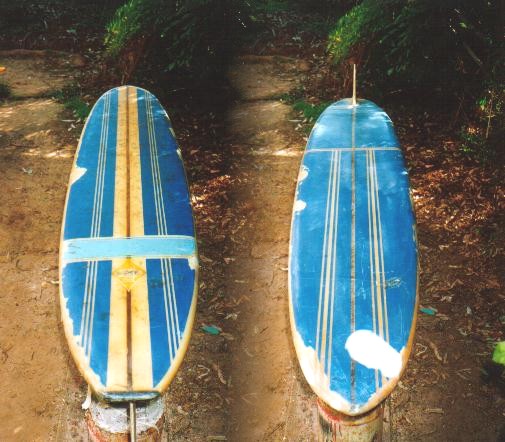
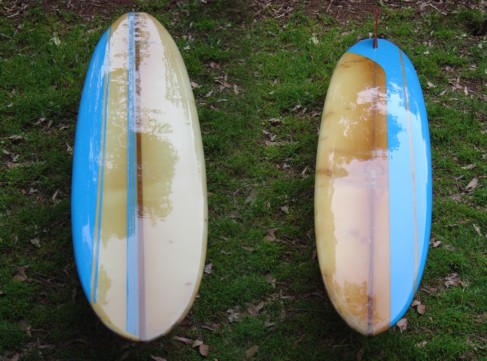 This is another Ron. Restored in 2004. Production No1654.
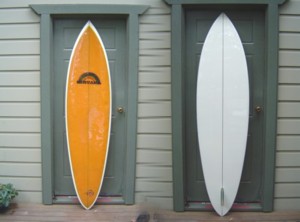 This is a Nirvana. Built at Kincumber on the NSW Central Coast. The board was shaped by Terry Moane. This is its second restoration. It is still owned by its original owner. The bottom needed to be re built. There was a large area of delam on the nose and there was a crease and delam on the tail forward of the fin. The deck had also delamed forward of the legrope plug. The bottom was reglassed, faired and painted with auto acrylic paint. And gloss coated. The deck is original.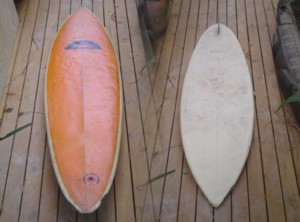
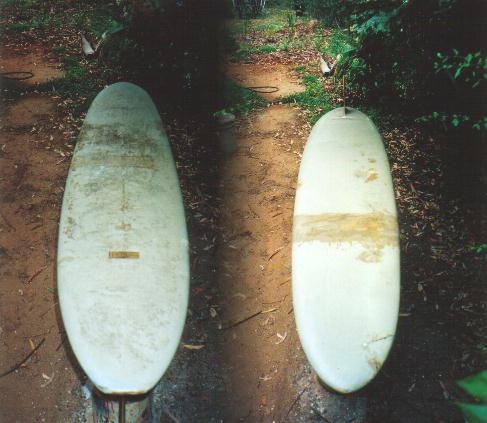 . The board had two coats of pigment applied at some stage prior to restoration. The first may have been original as the foam is still very white. It has a Greenough stage one fin. The bottom had to be pigment coated,due to the areas in the middle and at the nose of the board being to damaged to leave clear.