Wednesday, July 19, 2006

BING RESTORATION 2004

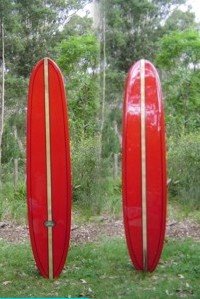
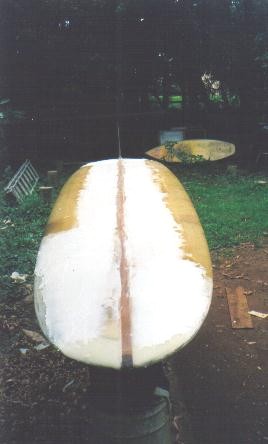
This is a BING. Built in California in 1961 by Bing Copeland.
This restoration can also be viewed with other restored Bings at the link below.
http://www.classicbingsurfboards.com/bingrestorations.html

INTRO


The owner of this board wanted to get back into surfing. He is the second owner. A mate of his purchased it while on a trip to the US. It was in pretty poor condition.
The stringer is 2" balsa or I should say was balsa. It was completely rotted and had to be replaced. It has a timber fin with inlays. This was also restored.

STEP ONE


The board was sanded to expose all the dings and old repairs. The remains of the balsa stringer were removed. This meant cutting down each side of the stringer with a diamond saw and scraping the rotted timber out. The foam is in excellent condition. Probably protected by the glue used to glue up the stringer.

THE STRINGER

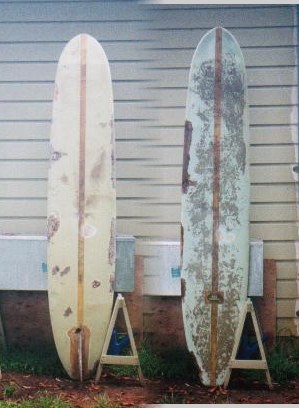
The dings were reglassed and sanded. All the low spots and rails have been faired with a 75% Q-cell 25% aerosil mix. Two layers of 6oz laminated over. The stringer has been rebuilt. End grain balsa was used. Blocks were laminated together and milled into 10mm thick planks. These were glued together two at a time in the board to fit the rocker. Once the stringer was fully glued together and cured, it was removed, the edges cleaned up and glued into the board. Two layers of 8oz-boat cloth were laminated over the stringer with Vinylester resin.

THE FIN


The original timber fin has been rebuilt and reset. All the old glass was removed. The timber was carefully sanded to remove all the excess glass and resin and to expose the inlay work. The trailing edge had to be replaced. Western Red Cedar was used. Two sealing coats of resin were applied. Then two layers of 10oz laminated to one side with 10mm of cloth overhanging. This side was then filler coated. The overhang was used to mould the continuous rovings, used to form the clear bead around the fin. Once cured the bead was sanded and two layers of 10oz were applied to the fin. Filler coated and sanded ready for setting onto the board. Once the fin was set, the board was filler coated and sanded ready for the pigment work.

PIGMENT COATS


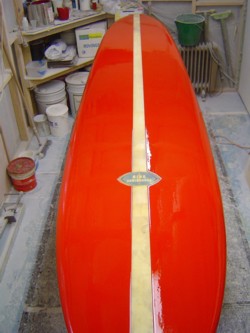
The stringer and rails were masked and the pigment coats brushed on. I use a mixture of surfboard lam resin and neutral spray gelcoat. 75% resin 25% gelcoat and 3% Wax in Styrene. The gelcoat is designed to cling to vertical surfaces. This helps on the rails to minimise sagging and separation. The gelcoat ups the geltime slightly without having to use higher catalyst percentages. The board was sanded ready for glossing.

GLOSS COATS

Pinlines were masked and brushed on using the same resin/gelcoat mix. The pinlines were lightly sanded and the board was glossed.

ORIGINAL ORDER


The above image is from Bing Copelands 1961 order book. Thanks to Bing for suppling the image.

POLISHING

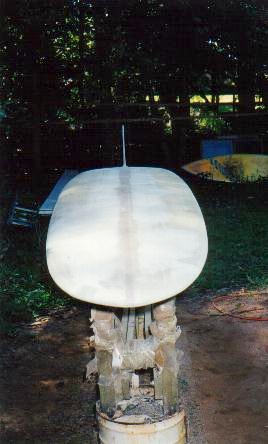
The gloss coats were wet and dry sanded with 600, 1200 and 1500 and the machine polished.
A total of 54 hours work.

Friday, July 14, 2006

KING RESTORATION 2002

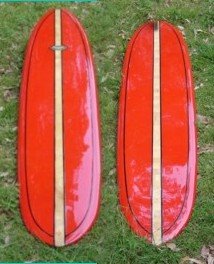
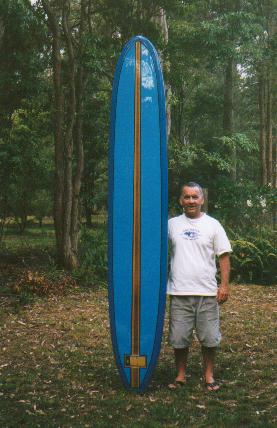
This is a KING steptail. Built by Graham King Surfboards on Sydneys South side in approx 1963. Graham King is still involved in the surboard industry today.
This board was found at a local NSW Central Coast market, in 2002, cost $200. The board was in poor condition and covered with non-original white gelcoat. Possible tail section missing. The original fin was missing and had been replaced with a 1970's Bahne-type fin-box (Multifins?) and plastic fin. See pre and post restoration photographs below. The condition of this board prior to restoration; on a scale of 1-10 would have been 2-21/2. The board was white all over. Probably not original because it covered the manufactures logo and the foam was quiet brown. It had major dings on the tail and nose, stress marks on the bottom, and fractures and dings all around the rails. The board was in such poor condition, there was no choice but to do a full pigment job. All the pigment / gelcoat was sanded off revealing the "King " logo and the wedge stringer on the deck. The fin box had to be removed and the step area rebuilt. The rails had to be faired and glassed, stress marks and dings repaired, and a new fin made and glassed in. Pigment coats applied, pin lined, wet & dry sanded and polished. A total of 40 hours work over a six month period.

THE FINISHED DECK

THE FINISHED BOTTOM

HAWAIIAN STEP TAIL

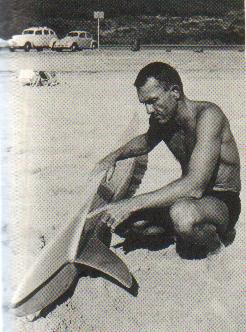
This image shows the board built by
John Kelly in Hawaii in 1962.
Which the Australian boards were probably based on.

Photo courtesy of "A Pictorial History of Surfing"
by Margan and Finney 1970.

ORIGINAL BOTTOM

Unfortunatly the King logo on the bottom
was damaged when the fin box was installed.

ORIGINAL DECK

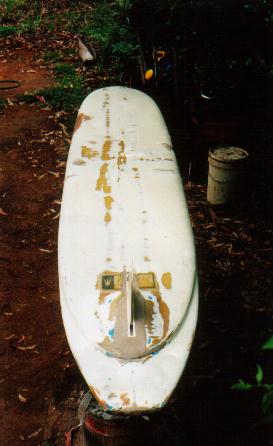
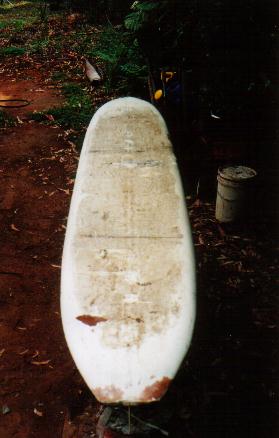
The white gelcoat had been added at some stage.
It covered the King logos and the foam was quiet brown.

PROFILE

This profile image shows
that the board has little
bottom curve or camber.
It seems very primitive
compared to the John Kelly board.

THE FIN

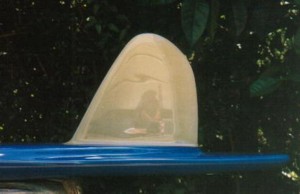
As mentioned a new fin had to be made.
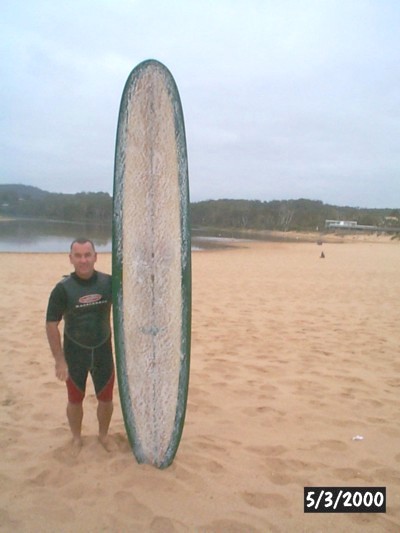
No clear photo could be found, of a fin template for an Australian version of this type of board. The only photo shows the board on its side. The fin looks as if it could be a reverse d fin. So that is what we went with. The dimentions are. Base 10.5 inches and Height 9 inches.

Thursday, July 13, 2006

GORDON WOODS RESTORATION 1999

This is the board that got the restoration side of my business up and running. It is a 9'6" Gordon Woods. Built in Brookvale on Sydneys Northern Beaches. By looking at the fin, I would think it was built around 1964/65.
This board was purchased from a work colleague for AU $100. The deck was in good condition, apart from the manufactures logo delaminating, and some large dents in the nose. These dents I think are due to the lack of glass on the nose on the bottom. The bottom was another story. No glass, for the fist two and half feet. from the nose. This resulting in the stringer being completely rotted for the whole length of the board. The stringer may have been Pacific Maple or Western red ceder. The rails had the usual amount of dings and fractures for a board of this age. The fin was intact and in good condition.
The first task was to replace the glass missing from the nose with two layers of 10 oz cloth. Next, replace the stringer, This meant cutting the glass on either side of the stringer with a diamond saw and scraping out the sludge with a chisel. The fin was not removed from the board. The original stringer was 20min wide which ment 25mm DAR fitted straight in. I laminated five lengths of 20min by 20min Pacific maple, using FGI RI 80 epoxy resin and AEROSIL silica, and clamped in place. After planing the excess timber off the stringer, 150min either side of the stringer was heavily ground and two layers of 10 oz cloth applied after sealing the stringer with a coat of resin. All the other dings where ground, reglassed and sanded. The whole board was then sanded and all the low spots filled and faired with 75% Q-CELL / 25% AEROSIL. Once fair all the filled areas were covered with one layer of 4oz cloth.
After sanding it was time for the pigment coats to hide the ugly spots. The deck was left clear as original. The rails were pigmented a dark green to the trim lines on the top and bottom. The bottom was pigmented a peppermint green leaving the stringer clear. The rails needed two coats, which has now become standard practice on all the restorations I've done since. After sanding to 1200 w&d a 1/4- black pinline was added top and bottom on the trim line. The board was then sanded with 1500 w&d and polished. The resin on the deck is original and did not need any extra work done to bring the gloss up.

PREPARED BOTTOM

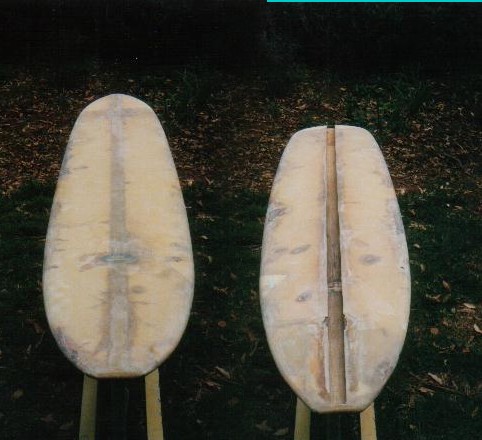
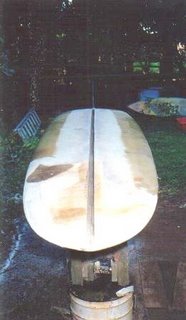
The bottom is ready for the new stringer
to be glued in, and glassed.

Wednesday, July 12, 2006

NEW STRINGER

The new stringer glued and clamped into place.

NEW STRINGER

Another view of the clamped stringer.

STRINGER GLASSED


The board is now ready for the lows to be filled.

LOWS FILLED

The bottom has been filled
and is ready to be sanded.

READY FOR PIGMENT

The bottom has been glassed
and sanded ready for the first pigment coat.

PIGMENT COAT

The first pigment coat. Peppermint Green.

PIGMENT COAT

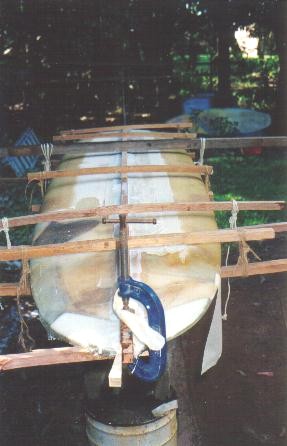
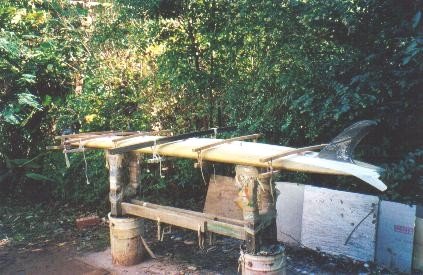
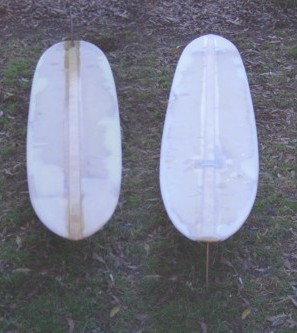
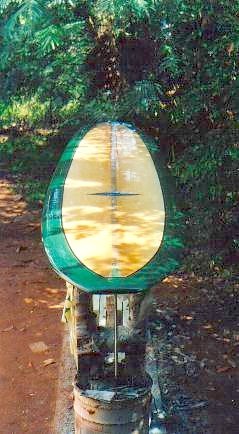
The pigment coat on the rails. Emerald Green.

FINISHED DECK

The finished deck.
With black pinlines.

Wednesday, July 05, 2006

FINISHED BOTTOM

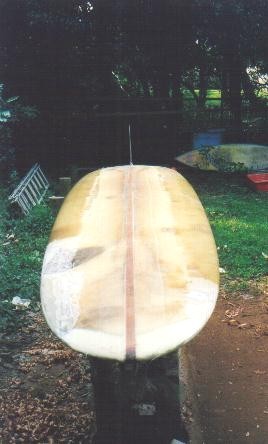
The finished bottom. Ready to surf.